Dreading nail trim day? You’re not alone.
Most guinea pigs squirm, squeak, and kick the moment you try to clip their nails.
But skipping it isn’t an option. Unlike wild cavies that wear their nails down on hard ground, pet guinea pigs need regular trims every 2 to 4 weeks.
Overgrown nails curl inward and cause pain. The key is having the right nail clippers and a calm technique.
10-Step Guide to Clipping Guinea Pig Nails
Follow these steps to make nail trimming safer and less stressful for both you and your piggy.
Step 1: Choose the Right Nail Trimmers
Baby nail clippers or small animal nail trimmers both work well. Quick note: human trimmers crush the nail together before cutting, which can be painful for your guinea pig.
Small animal nail clippers are guillotine-style, meaning the nail won’t get squeezed. They also open wider than human trimmers, making the nails easier to clip.
You can find these at your local pet store. Try both types to see what your guinea pig is most comfortable with.
Step 2: Locate the Quick
The quick is the pinkish-red part at the base of the toenail. It contains a blood vessel, so you don’t want to cut into it.
If you can’t see the quick clearly, try holding a small flashlight up to the nail when you clip. You can also just trim the very tip to be safe.
Step 3: Gather Styptic Powder and a Hand Towel
Styptic powder or cornstarch will quickly stop bleeding if you trim too far. Both work equally well.
You can find styptic powder with men’s shaving products at your local store. Cornstarch is in the baking aisle.
If your guinea pig squirms during nail trims, you can wrap them in the towel to keep them still. Try to use the same towel each time, as the familiar scent helps keep the process consistent.
Step 4: Set Up the Area
Arrange everything you need for nail trimming beforehand. Having it all ready will help the process go smoothly.
Place a small towel, nail trimmers, and styptic powder (or cornstarch) on a counter or tabletop. Put a small amount (about 1/4 teaspoon) of styptic powder or cornstarch on a paper towel for quick access in case you nick the quick.
Step 5: Remove Your Guinea Pig from the Cage
Reach into the cage with slow movements. Place the thumb of one hand under their jaw and support their rump with your other hand.
Using the proper technique to reach in and pick up your guinea pig won’t just prevent them from getting scared. It’ll also keep you from getting nipped.
Check our guide on how to pick up guinea pigs for more details.
Step 6: Wrap Your Guinea Pig in a Hand Towel
Place them in your lap wrapped in the towel. Be careful not to wrap too tightly, as this could cause overheating or difficulty breathing.
Your guinea pig should face away from you, which makes it harder for them to nip.
Step 7: Relax Your Guinea Pig
There are several things you can do to help your guinea pig relax before trimming. Try petting them gently behind the ears and offering small treats.
Don’t have food sitting out nearby, as it’ll distract them during the trim. Keeping your piggy calm will make the whole process easier.
Good treats include small pieces of bell peppers and carrots. Cut them into tiny pieces for easy eating.
Step 8: Choose a Paw and Gently Pull It Out
Don’t be surprised if your guinea pig squirms when you do this. If they squirm too much, release the leg and let them calm down before trying again.
Hold the nail steady between your thumb and index finger. Don’t squeeze too hard, as that’ll hurt and cause more wriggling.
Start with a nail on one side of the foot and work your way across. This helps you keep track of which nails you’ve already done.
Step 9: Trim the Nail
Position the trimmers before the nail and identify the quick. It’s easier to see in lighter-colored nails than darker ones.
In light nails, the quick looks pink. Trim just in front of it.
If you can’t see the quick, use caution and trim a small bit at a time.
If you cut the quick, the nail will bleed. While it’s painful for your guinea pig, you haven’t caused any lasting harm.
Touch a small amount of styptic powder or cornstarch to the nail, and the bleeding will stop quickly.
Continue with the rest of your guinea pig’s nails. If your piggy gets anxious, give them time to calm down before continuing.
Offering a treat after each nail provides positive reinforcement and keeps them distracted.
Make sure they finish eating before starting the next nail to prevent choking.
Step 10: Return to the Cage and Clean Up
If this was your first time trimming, don’t be too hard on yourself if things didn’t go perfectly. Guinea pigs will squirm during nail trims at any age.
If it went poorly, consider trimming over several days rather than all at once. This might be easier for both of you.
If you applied styptic powder or cornstarch to any nails, check those nails to make sure the bleeding has stopped. Wipe off the powder before putting your guinea pig back to prevent accidental ingestion.
Quick Tips for Cutting Guinea Pig Nails
Here are some quick tips that can make the process smoother.
Trim your guinea pig’s nails on top of a counter or table. Pick them up and give them something comforting.
Wrap your guinea pig in a fleece to help them feel secure.
It’s a good idea to use the same fleece each time, as it’ll help them get used to the routine. This should make them feel more and more comfortable with each session.
Don’t wrap your guinea pig too tightly or cover their head.
Give Your Guinea Pig a Treat and Get Them Settled
They can sit either on your lap or on top of the table, as long as they’re safe and can’t fall off. Keep other food out of sight and smell range so your guinea pig isn’t distracted.
Take a gentle but firm hold of your guinea pig’s front leg. Don’t be surprised if they wiggle free and tuck it back in!
It takes practice and patience to get used to cutting nails.
If your guinea pig gets upset, release the leg and offer reassurance. You can pause and restart this process as many times as needed.
Steady the Nail Between Your Thumb and Index Finger
Don’t squeeze or hold too firmly, as this will cause discomfort. Pick the nail at the end of the foot and work your way inward so it’s easy to keep track.
Identify the Quick Before Cutting
This is simpler on lighter-nailed guinea pigs than darker ones. The quick is a vein that runs up the nail but not to the very tip, which is why you should only trim the tip.
The more you trim your guinea pig’s nails, the better you’ll get at judging the right amount to take off.
Continue Cutting the Rest of the Nails
If they’re uncomfortable and frantically trying to get away, give them a treat and stop there. Never try to force your guinea pig to keep still, as this will cause stress and injury.
What to Do If You Cut the Quick
The hardest part about trimming nails isn’t actually cutting them. Guinea pigs barely ever sit still, and it’s tough to see where the quick ends.
For light-pawed guinea pigs, it should be fairly simple to see the blood vessel under each nail. For darker nails, try shining a light underneath to see the vein.
Accidents happen, and while it feels awful to make your guinea pig bleed, it won’t cause any lasting harm. If you do cut the quick, don’t panic.
Apply styptic powder to stop the bleeding and comfort your piggy. If the bleeding continues, apply a little pressure for one to two minutes.
If it still bleeds after that, contact your vet.
How Often Should You Trim Guinea Pig Nails?
Aim for every two weeks to once a month. Regular trimming keeps the quick from growing too far up the nail, which reduces the chance of accidentally cutting it.
There are two approaches to getting your guinea pig used to the process. The first is to go through the routine above without actually cutting.
This gets your guinea pig comfortable with having its paws handled. Give lots of praise, petting, and treats during these practice sessions.
Then gradually introduce actual trimming. Start with just one nail and stop.
Work up to two nails each session, and eventually your guinea pig should be comfortable with the full trim.
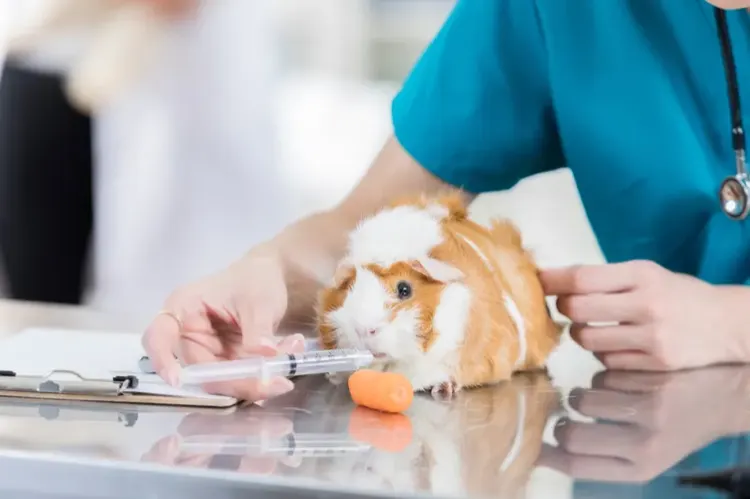
The other option is to take your guinea pig to a professional. Check with your local vets to see if they offer nail trimming.
Some pet shops with grooming sections also offer this service for a fee.
Which Trimmers Work Best for Guinea Pig Nails?
Like with other pets, there are trimmers specifically made for guinea pigs. They have a rounded cutting edge, though some people (myself included!) find them tricky to use and prefer simple nail or toenail clippers.
Pick whatever you feel comfortable with and find easiest to use. Some human nail trimmers don’t have large enough openings for the nail, but trimmers with extra-large openings work great.
Young guinea pigs have softer, more delicate nails than older guinea pigs, whose nails get thicker with age. Nails on the back feet tend to be thicker than the front ones.
Many owners get nervous about nail cutting because they’re scared of cutting the quick. This is the red vein running through the nail, and if you cut it, it’ll bleed.
The more frequently you cut the nails, the more the quick will recede. This makes each trim a little easier and less stressful.
What You Need to Cut Your Guinea Pig’s Nails
First, you’ll need small pet nail trimmers or human toenail trimmers (toenail trimmers work better because of the nails’ thickness).
Next, keep styptic powder handy in case of bleeding. If you don’t have any, cornstarch works as a substitute.
You may also want magnifying glasses with LED lights to help spot the quick in darker nails.
Final Thoughts
Clipping guinea pig nails takes practice and patience. Don’t stress if the first few sessions don’t go smoothly, because that’s completely normal.
The most important things to remember are to trim every two to four weeks, avoid the quick, and keep styptic powder nearby. With consistent, gentle handling, your piggy will get more comfortable with each trim.
If you’re still nervous, your vet or a local pet groomer can help until you feel confident doing it yourself.
Frequently Asked Questions
Dark nails make it harder to spot the quick, but shining a flashlight behind the nail often reveals the vein. Trim only the very tip and take off small amounts at a time. Regular trims keep the quick shorter, making each session safer and easier to manage.
Regular scissors aren't recommended because they can crush or split the nail. Use small animal nail clippers or human toenail clippers instead. These tools provide a clean cut without putting sideways pressure on the nail, which keeps your piggy comfortable and reduces the risk of injury.
It's perfectly fine to spread nail trimming across multiple sessions. Many owners do one or two paws per day until all nails are done. This keeps stress levels low for both you and your piggy. Consistency matters more than finishing everything in one sitting.
You can start trimming nails as early as four to six weeks old. Starting young gets your guinea pig used to the process, which makes future trims much easier. Baby nails are softer and shorter, so you'll only need to take off a tiny amount each time.